 Save
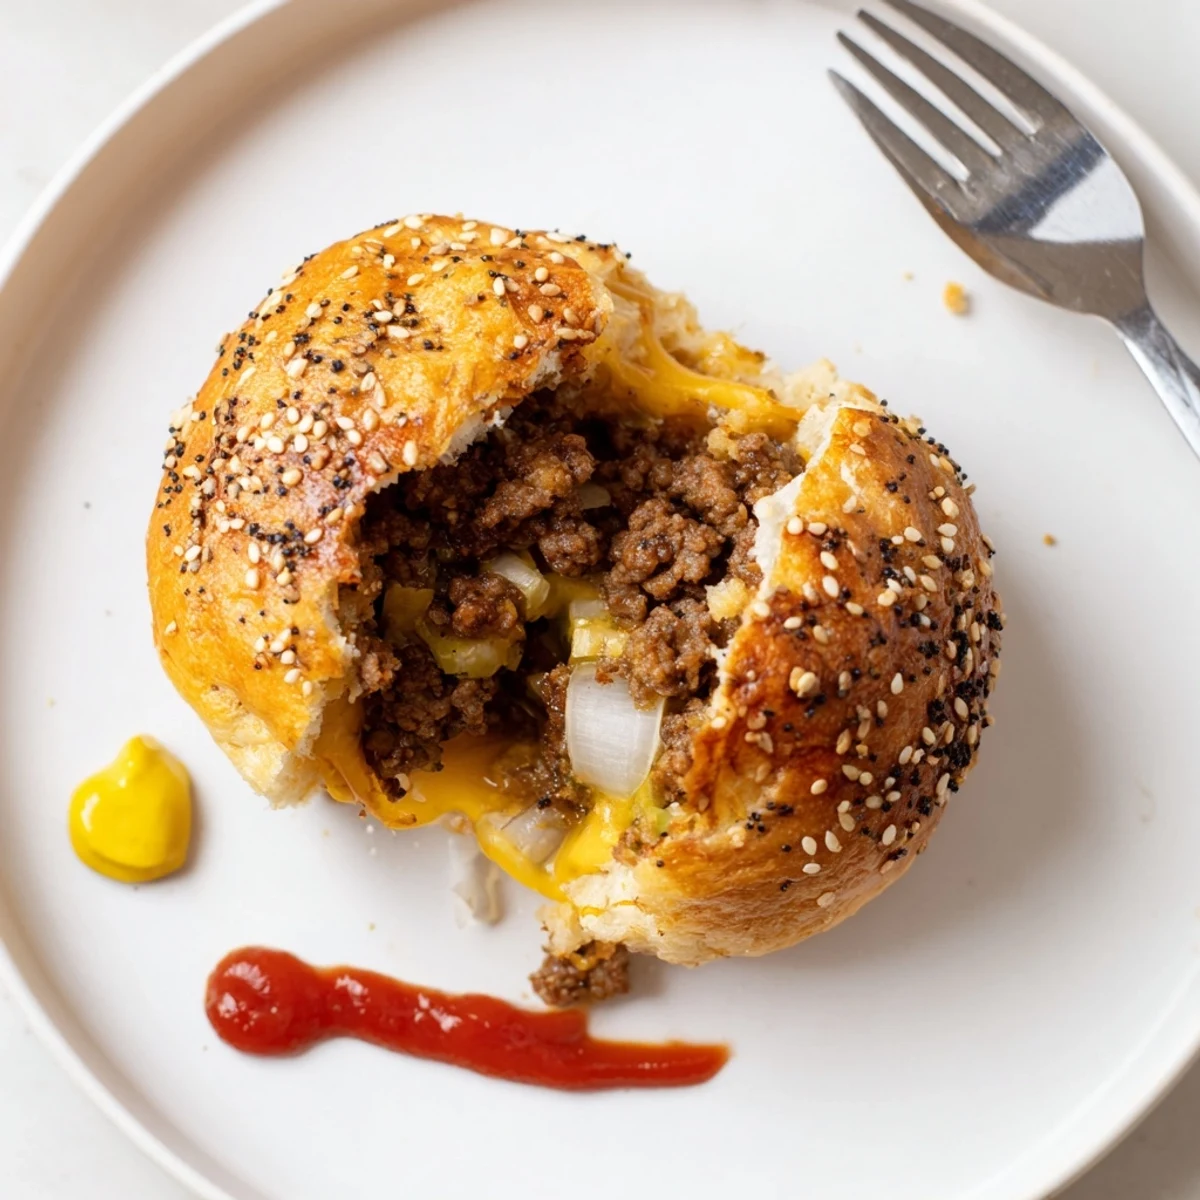
Save These biscuit-wrapped cheeseburger bombs are a hands-on crowd pleaser: sauté diced onion, brown seasoned ground beef, then stir in ketchup, mustard and Worcestershire. Spoon beef and shredded cheddar onto flattened biscuit rounds, top with a mozzarella cube, seal tightly and brush with egg wash. Sprinkle sesame and bake at 200°C (400°F) until deeply golden. Cool slightly and serve warm with dipping sauces for a melty, savory bite.
It was a rainy weekend when the urge hit me for something bold and satisfying—a dish with all the flair of a cheeseburger, but as shareable bites. My kitchen was full of that comforting, slightly toasty aroma as cheese and beef met buttery biscuit dough; the sizzle from the skillet seemed to promise a little party with every bite. Laughter echoed in the background while I stuffed mozzarella cubes into the center; I couldn’t help but smile, thinking how every bomb would be its own gooey surprise. This recipe took the spirit of burger night and wrapped it up in a golden, hand-held package.
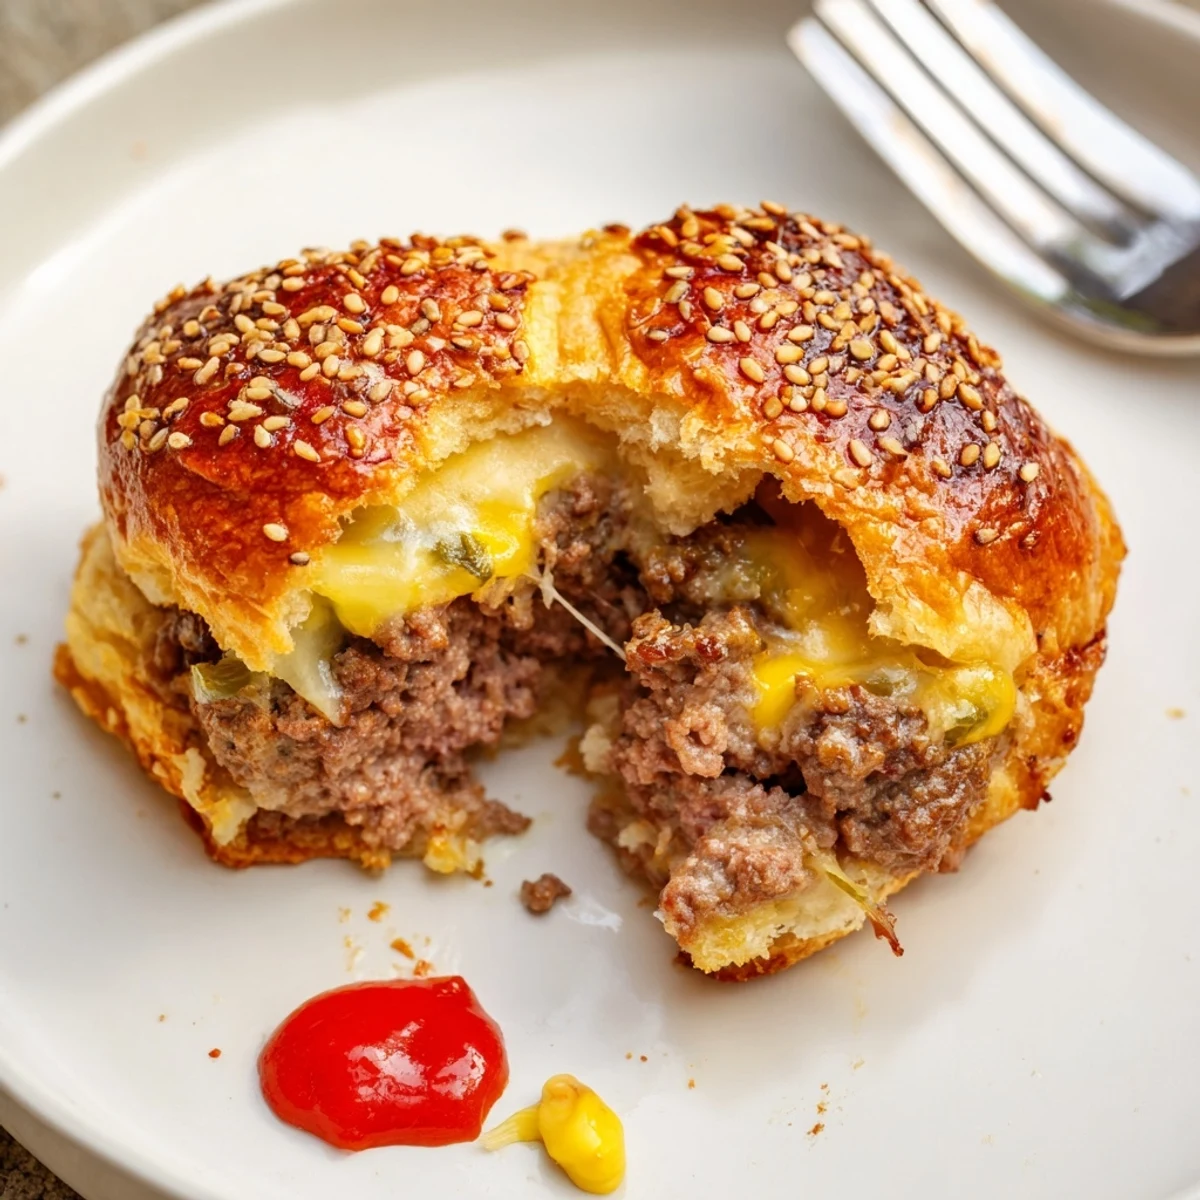
I remember bringing out a tray of these cheesy bombs for a family game night—the moment I cracked one open, the table fell silent except for the ‘wow’ of molten cheese stretching between the halves. There was something mischievous about everyone guessing what was inside each golden pocket: extra pickles, an ooze of cheddar, or a hint of bacon if I tucked some in. That small suspense made the laughter even louder, especially when someone found extra cheese hidden in theirs.
Ingredients
- Ground beef: Go for 80/20 for juicy bites, and crumble it well so every bomb gets even flavor.
- Shredded cheddar cheese: Sharp cheddar melts perfectly and packs more punch, but any favorite works.
- Small mozzarella cubes: These tucked-in cubes melt to create that perfect cheese-pull moment; don’t skip them!
- Finely diced onion: Sweat these just until translucent for a subtle sweetness without overpowering.
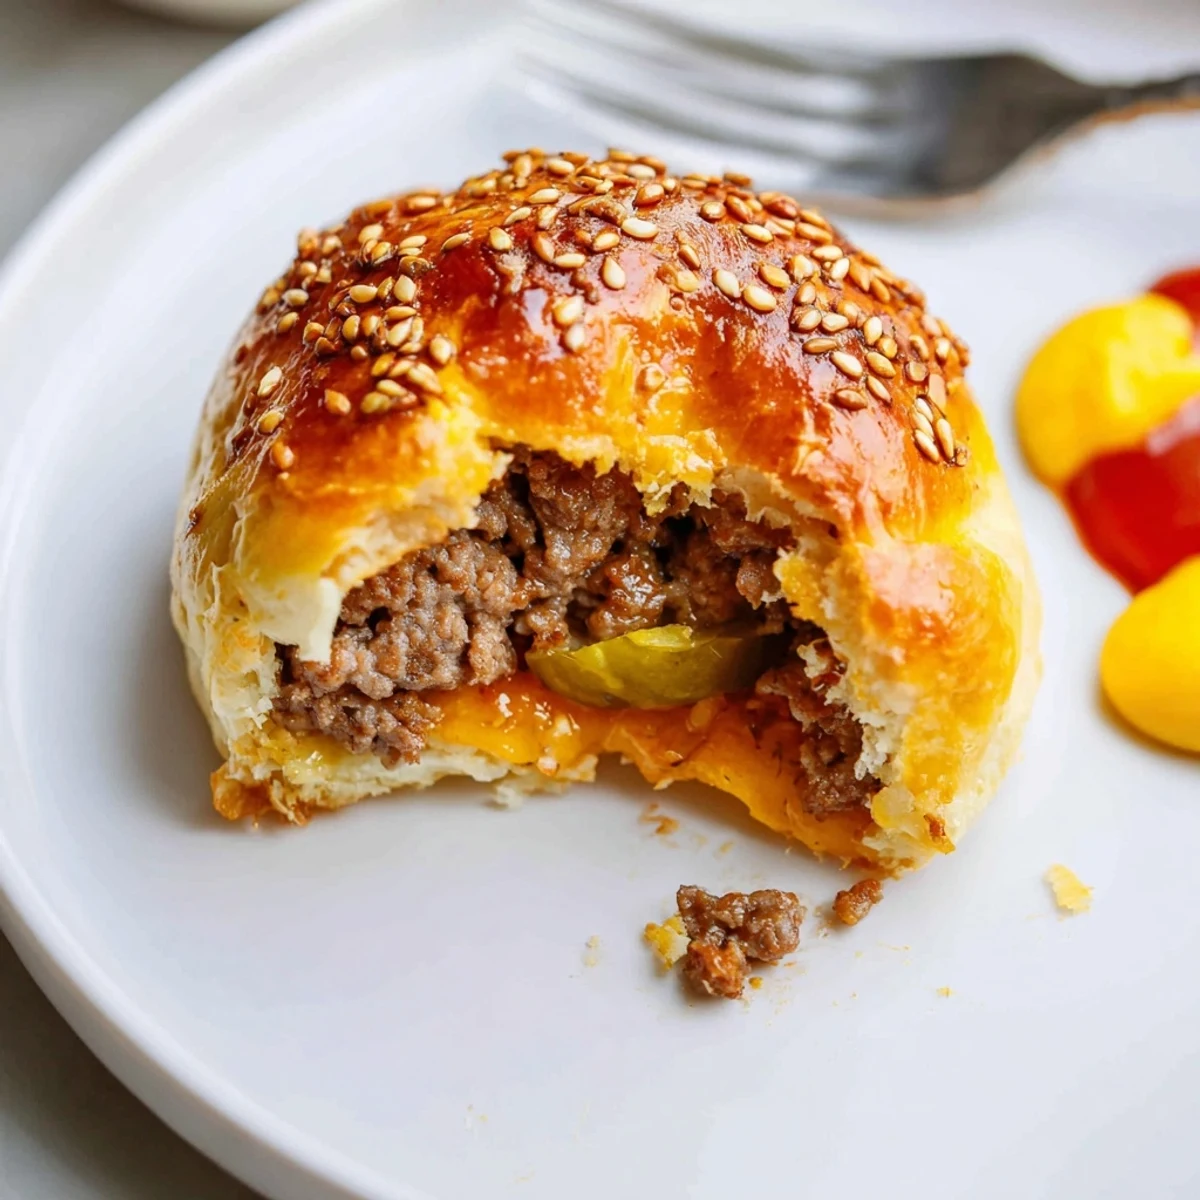
- Chopped pickle (optional): Adds a tangy crunch for classic burger flair—my little trick for extra zip.
- Refrigerated biscuit dough: Easy and reliable; flatten gently so they don’t tear while wrapping.
- Ketchup, mustard, Worcestershire sauce: This classic trio seasons the beef and gives it unmistakable burger taste in every bite.
- Garlic powder, salt, black pepper: Sprinkle evenly to enhance the savoriness.
- Beaten egg (for egg wash): Brushing just a little gives a glossy, golden finish after baking.
- Sesame seeds: Sprinkling these on top adds texture and the burger bun vibe that everyone recognizes.
Instructions
- Fire up the oven:
- Preheat to 200°C (400°F) and line your baking sheet with parchment—think of it as your nonstick stage.
- Sauté and brown the beef:
- Let the onions soften in a skillet over medium heat, then add the beef, letting the garlic’s aroma bloom; stop when the beef is just golden.
- Season and stir:
- Add ketchup, mustard, Worcestershire, and pickles, stirring until everything is evenly coated—let it cool so it doesn’t wilt the dough later.
- Form the biscuit pockets:
- Gently flatten each biscuit, then pile a spoonful of beef, cheddar, and that secret mozzarella cube in the center.
- Seal the cheesy parcels:
- Gather the dough up over the filling and pinch it tight—smooth the seams so nothing leaks out the sides as they bake.
- Egg wash and sprinkle:
- Brush each ball with beaten egg and top with sesame seeds for a little extra crunch and shine.
- Bake to golden perfection:
- Pop them in the oven for 15–18 minutes, watching for when the tops go deep golden and the kitchen starts smelling irresistible.
- Cool and enjoy:
- Let the bombs rest a few minutes so cheese doesn’t escape everywhere, then dive in with your favorite dipping sauces.
 Save
Save One night, a friend dropped by unannounced, and I happened to have a batch nearly ready. We ended up standing at the counter, pulling apart the bombs while chatting about everything but food—suddenly the kitchen felt more like a cozy corner pub than my usual space. It was in those moments, trading stories between bites, that these became more than just a recipe; they became a reason to linger a little longer together.
Making Swaps and Add-Ins
Over time, I’ve played with variations that keep things interesting: spicy jalapeños for smoky heat, or swapping in pepper jack for extra kick. Sometimes a crumble of crispy bacon sneaks into the beef mixture, and no one has ever complained. When a gluten-free friend visits, store-bought gluten-free biscuit dough pulls it all together without fuss.
Serving Suggestions Everyone Loves
I’ve learned the perfect pairing is a platter of assorted burger sauces—think ketchup, smoky barbecue, and even a little sriracha mayo. Chilled pickles or a side salad keep things light, balancing all that melty richness. These go quickly at parties, so serving plenty is nonnegotiable if you want any left for yourself!
Kitchen Lessons I Won’t Forget
One afternoon the bombs baked unevenly because I crowded them too close on the tray—they crave just a little space to puff and brown evenly. Brushing with egg wash right before baking (not too soon) keeps the biscuits beautifully shiny every time. There’s a little thrill in hearing the crunch as you tear one open, revealing that warm, molten core.
- If the dough feels sticky, dust your hands with flour.
- Don’t skip draining the beef; greasy filling makes the bombs soggy.
- Watch the bottoms the last few minutes so they don’t get too dark!
 Save
Save Whether for a family night or last-minute gathering, these cheeseburger bombs bring more than just flavor—they turn even the simplest meal into something memorable. Here’s to hidden cheese, a little mess, and big smiles shared over warm trays.
Recipe FAQs
- → How do I prevent the filling from leaking?
-
Press the dough edges firmly when sealing and pinch or fold the seam under the ball so it sits seam-side down. Chill filled bombs for 10 minutes before baking to help the dough hold its shape.
- → Can I make these ahead of time?
-
Assemble and refrigerate on a lined tray for up to 24 hours, covered. For longer storage, freeze on the tray until firm, then transfer to a freezer bag. Bake from frozen, adding a few extra minutes to the baking time.
- → What cheeses work best for melting?
-
Cheddar provides sharp flavor while a mozzarella cube gives a gooey center. Pepper jack adds heat; fontina or Monterey Jack melt smoothly as well. Use a combination for balance.
- → How can I keep the bottoms from getting soggy?
-
Bake on a preheated baking sheet and avoid overcrowding. Using parchment helps, but a light oil or a preheated heavy baking tray will encourage even browning on the bottom.
- → Any tips for extra flavor variations?
-
Stir cooked bacon bits into the beef, swap cheddar for pepper jack, or add finely chopped pickles and a splash of hot sauce. Finish with a sprinkle of sesame or everything seasoning for contrast.
- → How should leftovers be reheated?
-
Reheat in a 180°C (350°F) oven for 8–10 minutes to restore crispness, or air-fry at 175°C (350°F) for 4–6 minutes. Microwaving will warm them but may soften the exterior.