 Save
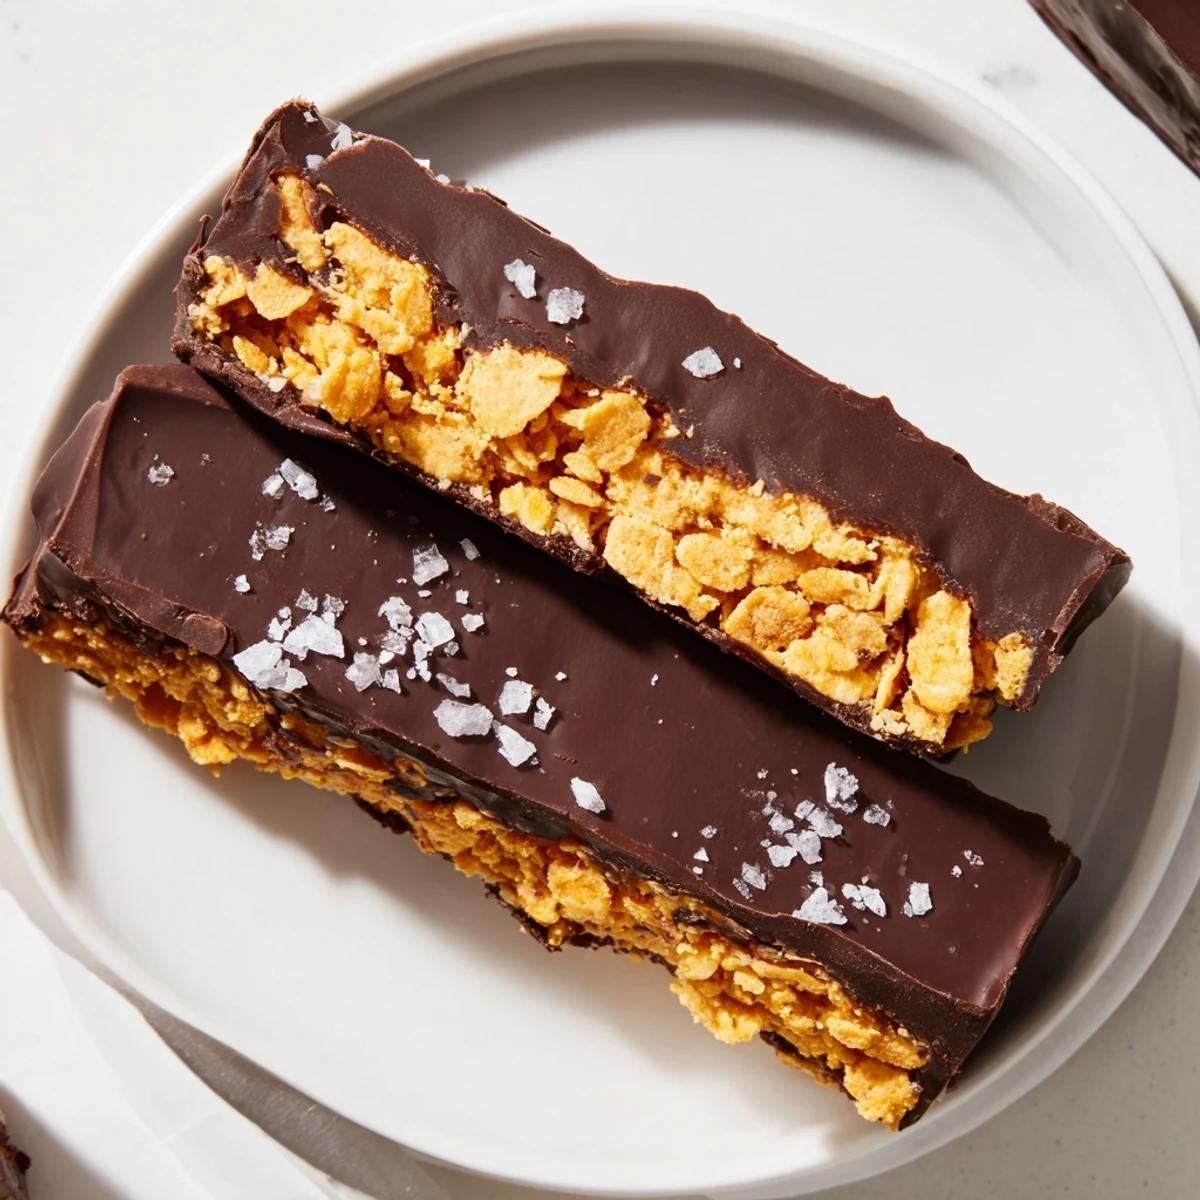
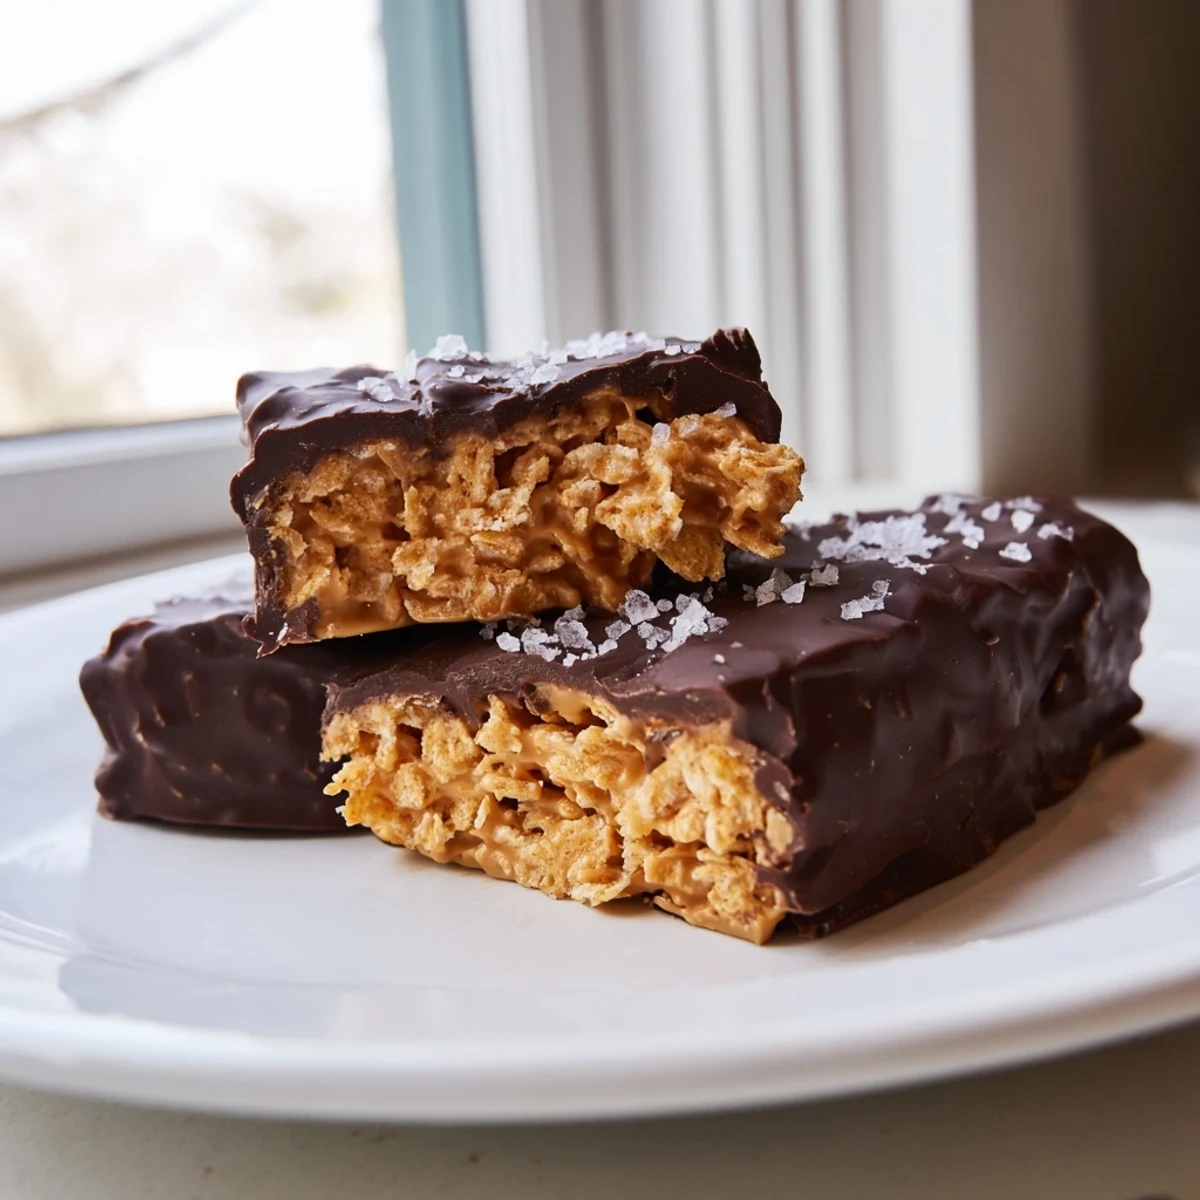
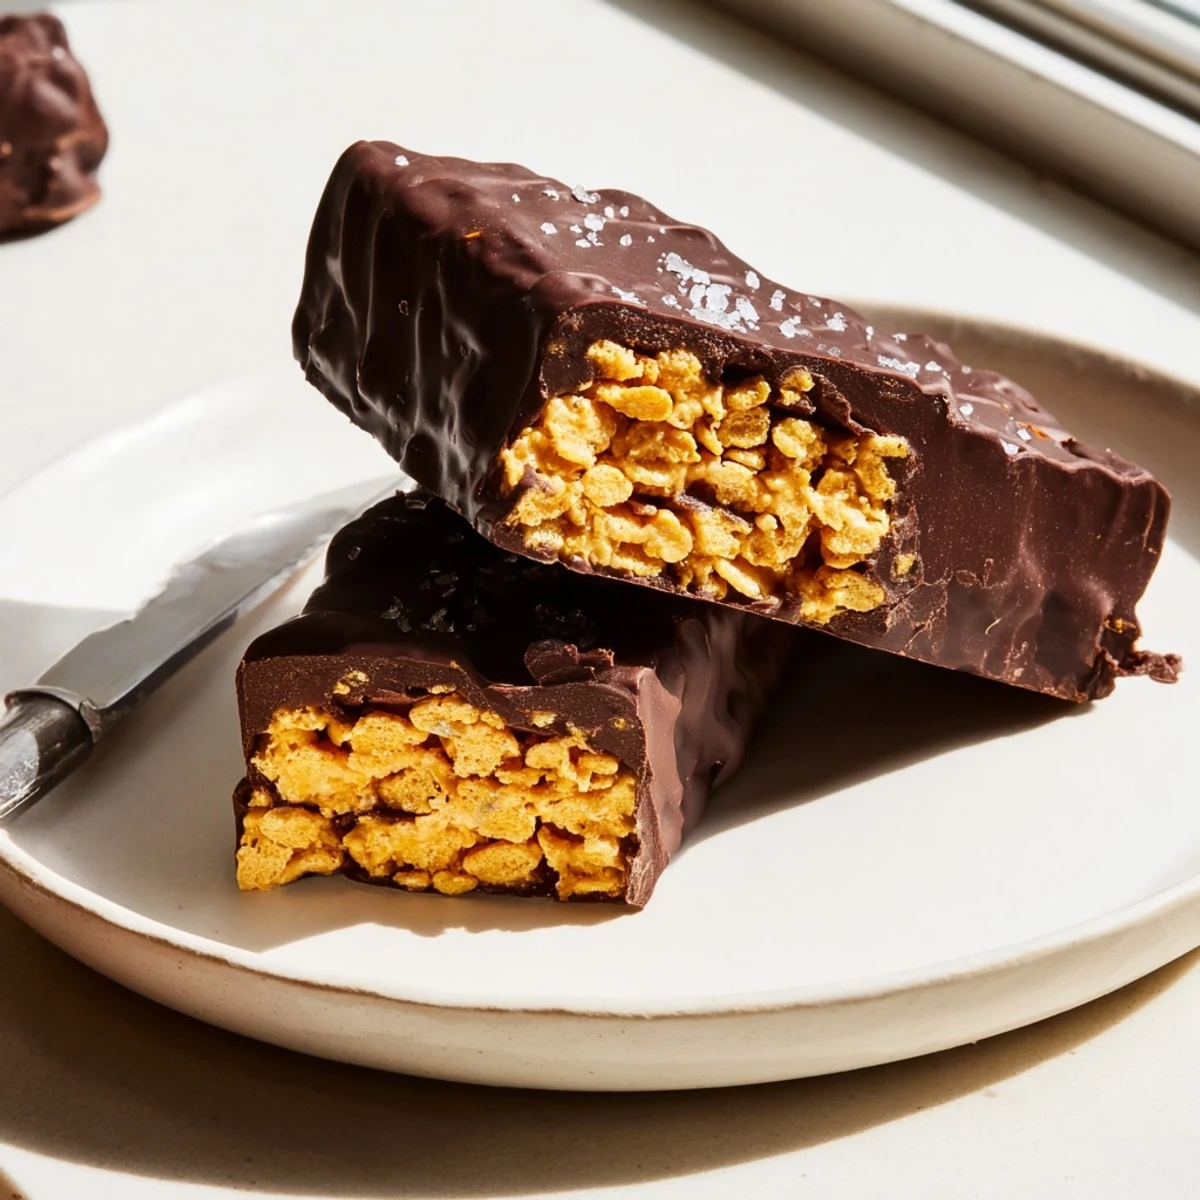
Save These healthy homemade Butterfingers capture everything you love about the classic candy bar — that signature crunchy peanut butter center and glossy chocolate shell — but with wholesome ingredients you can feel good about.
Natural peanut butter, a touch of maple syrup, and crispy cornflakes come together to create that unmistakable flaky crunch. Each bar gets fully dipped in melted dark chocolate for an irresistible coating that sets up beautifully in the fridge.
Ready in about an hour with only 10 minutes of active cooking, these no-bake bars are vegetarian, easily made vegan and gluten-free, and perfect for meal prep snacking.
The candy aisle at the grocery store always gets me, especially around Halloween when those orange and yellow Butterfinger packages are stacked like little towers of temptation. One rainy Tuesday evening, instead of grabbing a bag, I drove home and started pulling jars of peanut butter and bags of cornflakes from the cabinet. Three batches later, I had something that crackled and melted in all the right ways, without the ingredient list of a chemistry experiment. My roommate walked in, ate four bars standing at the counter, and declared we should never buy candy again.
I brought a tin of these to a friends potluck last winter and watched a quiet crowd form around the dessert table within minutes. Someone asked which bakery I had ordered from, and I nearly dropped my drink laughing. There is something deeply satisfying about watching people devour a candy bar you pressed together with a spatula in your own kitchen.
Ingredients
- Natural creamy peanut butter: The star of the crunch layer, so use a brand where peanuts are the only ingredient and the oil separates at the top.
- Pure maple syrup or honey: This binds the peanut butter and sweetens without refined sugar, and maple syrup keeps the recipe vegan.
- Vanilla extract: A small amount rounds out the flavors and adds warmth to the peanut butter base.
- Cornflakes, lightly crushed: These create that flaky interior texture that makes a Butterfinger unmistakable, so crush them gently by hand to keep some larger shards.
- Sea salt: Just a pinch in the filling and an optional sprinkle on top balance the sweetness beautifully.
- Dark chocolate chips: Go for at least 60 percent cacao for a rich coating that snaps when you bite into it.
- Coconut oil: Thinned into the chocolate, it creates a glossy shell that sets firm in the fridge.
Instructions
- Prep your pan:
- Line an 8x8 inch baking dish with parchment paper, letting the edges hang over the sides like handles so you can lift the slab out cleanly later.
- Warm the base:
- In a saucepan over medium-low heat, stir the peanut butter and maple syrup together until they melt into one smooth, glossy mixture, about two to three minutes. Take it off the heat before it bubbles, then stir in the vanilla and a pinch of salt.
- Fold in the crunch:
- Pour the crushed cornflakes into the warm peanut butter mixture and fold gently with a spatula until every flake is coated and sticky. Work quickly here because the mixture firms up as it cools.
- Press and freeze:
- Transfer the mixture into your prepared pan and press it down firmly and evenly with your spatula, getting into the corners. Slide the pan into the freezer for 20 to 30 minutes until the slab feels solid and cold to the touch.
- Cut into bars:
- Lift the slab out using the parchment overhang and set it on a cutting board. Slice into 16 even bars with a sharp knife, wiping the blade between cuts for clean edges.
- Melt the chocolate:
- Combine the chocolate chips and coconut oil in a microwave-safe bowl and heat in 30-second bursts, stirring between each, until the mixture is completely smooth and shiny. You can also use a double boiler if you prefer gentle, even heat.
- Coat each bar:
- Dip one bar at a time into the melted chocolate, using a fork to flip it and tap off the excess. Set each coated bar on a fresh sheet of parchment and watch that glossy shell start to set before your eyes.
- Chill until set:
- Place the tray of coated bars in the refrigerator for 15 to 20 minutes until the chocolate is firm to the touch and no longer tacky. Store them in an airtight container in the fridge and grab one whenever the candy aisle temptation strikes.
 Save
Save One Christmas I tucked a dozen of these into a tin with a handwritten label and gave them to my neighbor, who had been shoveling my driveway all season without complaint. She knocked on my door the next morning holding the empty tin and said, plainly, that I owed her a refill. That tin has been circulating between our kitchens ever since.
Storage and Freezing Tips
These bars keep beautifully in an airtight container in the refrigerator for up to two weeks, though they rarely last that long in my house. If you want to stash some for a rainy day, layer them between sheets of parchment in a freezer-safe container and they will stay perfect for up to three months. Let frozen bars sit at room temperature for about ten minutes before eating so the peanut butter center softens slightly.
Making It Your Own
Swap the dark chocolate for milk chocolate if you prefer a sweeter coating, or drizzle white chocolate over the tops for a candy shop look. A friend of mine adds a tablespoon of espresso powder to the peanut butter base and swears it tastes like a peanut butter mocha bar. You can also press the mixture into silicone molds instead of a pan for fun shapes that kids love.
Allergen Notes and Ingredient Swaps
This recipe is naturally vegetarian and gluten-free as written, provided you use certified gluten-free cornflakes. Check your chocolate chip labels carefully because cross-contamination with dairy and soy is common in processing facilities. Always read every label if you are cooking for someone with serious allergies.
- For a fully vegan version, use maple syrup instead of honey and choose dairy-free chocolate chips.
- Sunflower seed butter can replace peanut butter, though the flavor will be noticeably different and slightly earthier.
- Sprinkle flaky sea salt on top of each bar right after dipping for a sweet-and-salty finish that people will remember.
 Save
Save There is a particular kind of joy in cracking open your own homemade candy bar, hearing that chocolate shell snap, and knowing you made something that rivals anything wrapped in plastic. Keep a batch in your fridge and you will always have a small, sweet reason to smile.
Recipe FAQs
- → Can I use a different type of nut butter?
-
Yes, almond butter or sunflower seed butter work well as substitutes. Keep in mind the flavor will change slightly, and sunflower seed butter can sometimes turn green when baked with baking soda due to a chemical reaction with chlorogenic acid.
- → How should I store these Butterfinger bars?
-
Store the bars in an airtight container in the refrigerator for up to 2 weeks. They can also be frozen for up to 3 months. The chocolate coating stays firm when chilled, making them a great make-ahead treat.
- → Can I make these bars vegan?
-
Absolutely. Use maple syrup instead of honey, and choose dairy-free dark chocolate chips. Coconut oil is already plant-based, so the rest of the ingredients naturally align with a vegan diet.
- → Why are my cornflakes getting too crushed when mixing?
-
Fold the cornflakes in gently using a spatula rather than stirring vigorously. You want them lightly crushed with some texture remaining — that's what gives these bars their signature Butterfinger crunch. Adding them in two batches can also help distribute them more evenly.
- → What's the best way to dip the bars in chocolate?
-
Use a fork to lower each bar into the melted chocolate, then tap the fork gently against the bowl edge to remove excess. Place dipped bars on parchment paper. Work quickly while the bars are still cold from the freezer — this helps the chocolate set faster and creates a thinner, more even coating.
- → Can I use milk chocolate instead of dark chocolate?
-
Yes, milk chocolate works perfectly if you prefer a sweeter coating. Just note that milk chocolate is softer at room temperature than dark chocolate, so the bars will need to stay refrigerated until serving to maintain their shape.