 Save
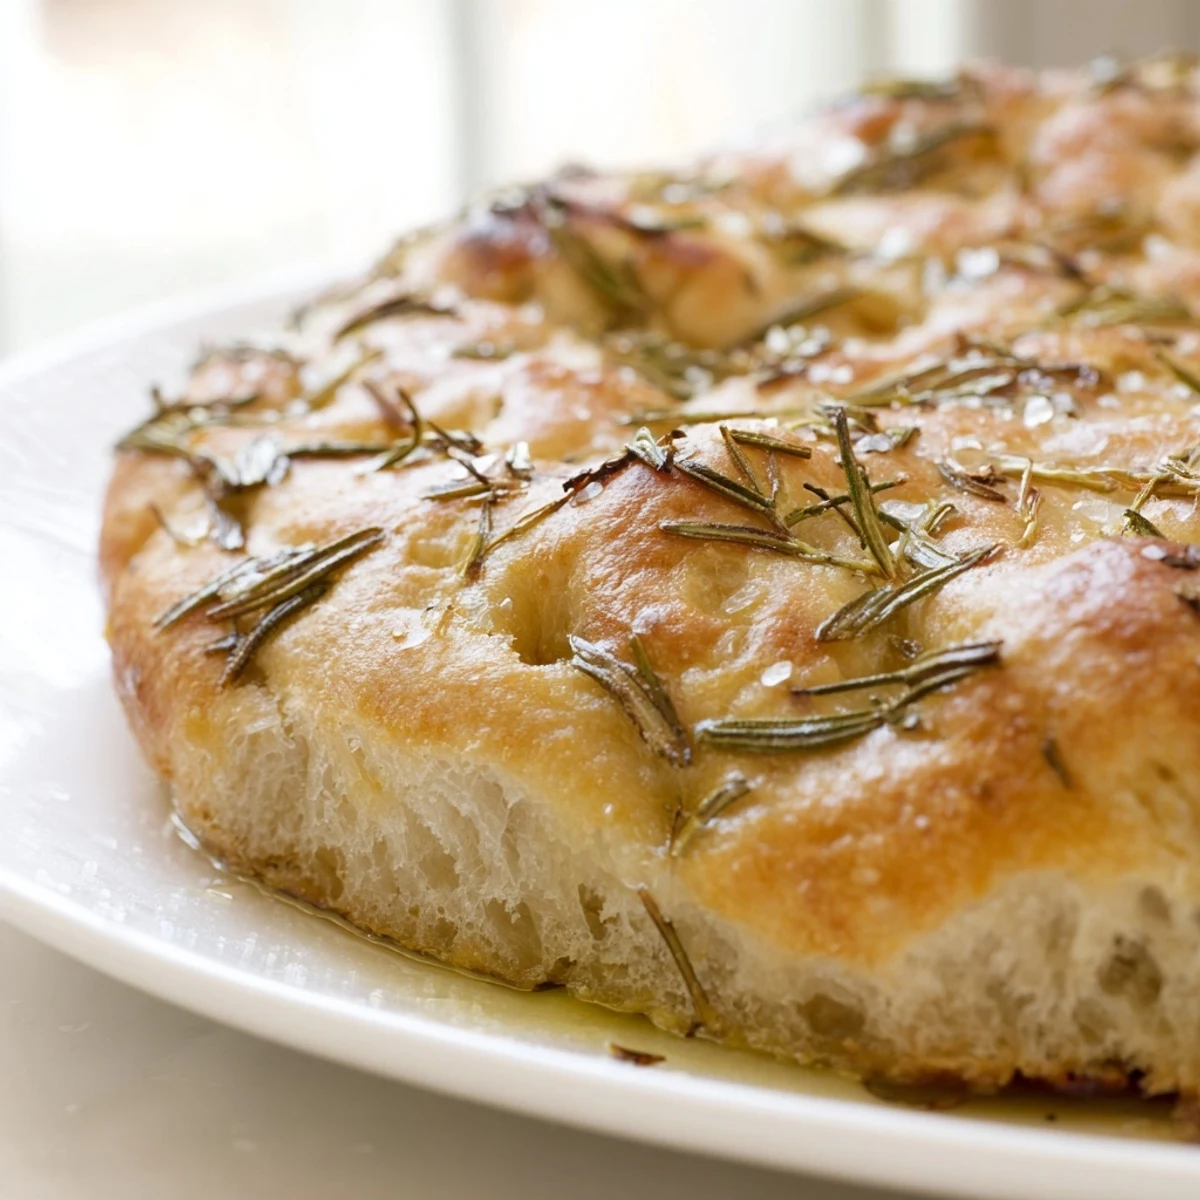
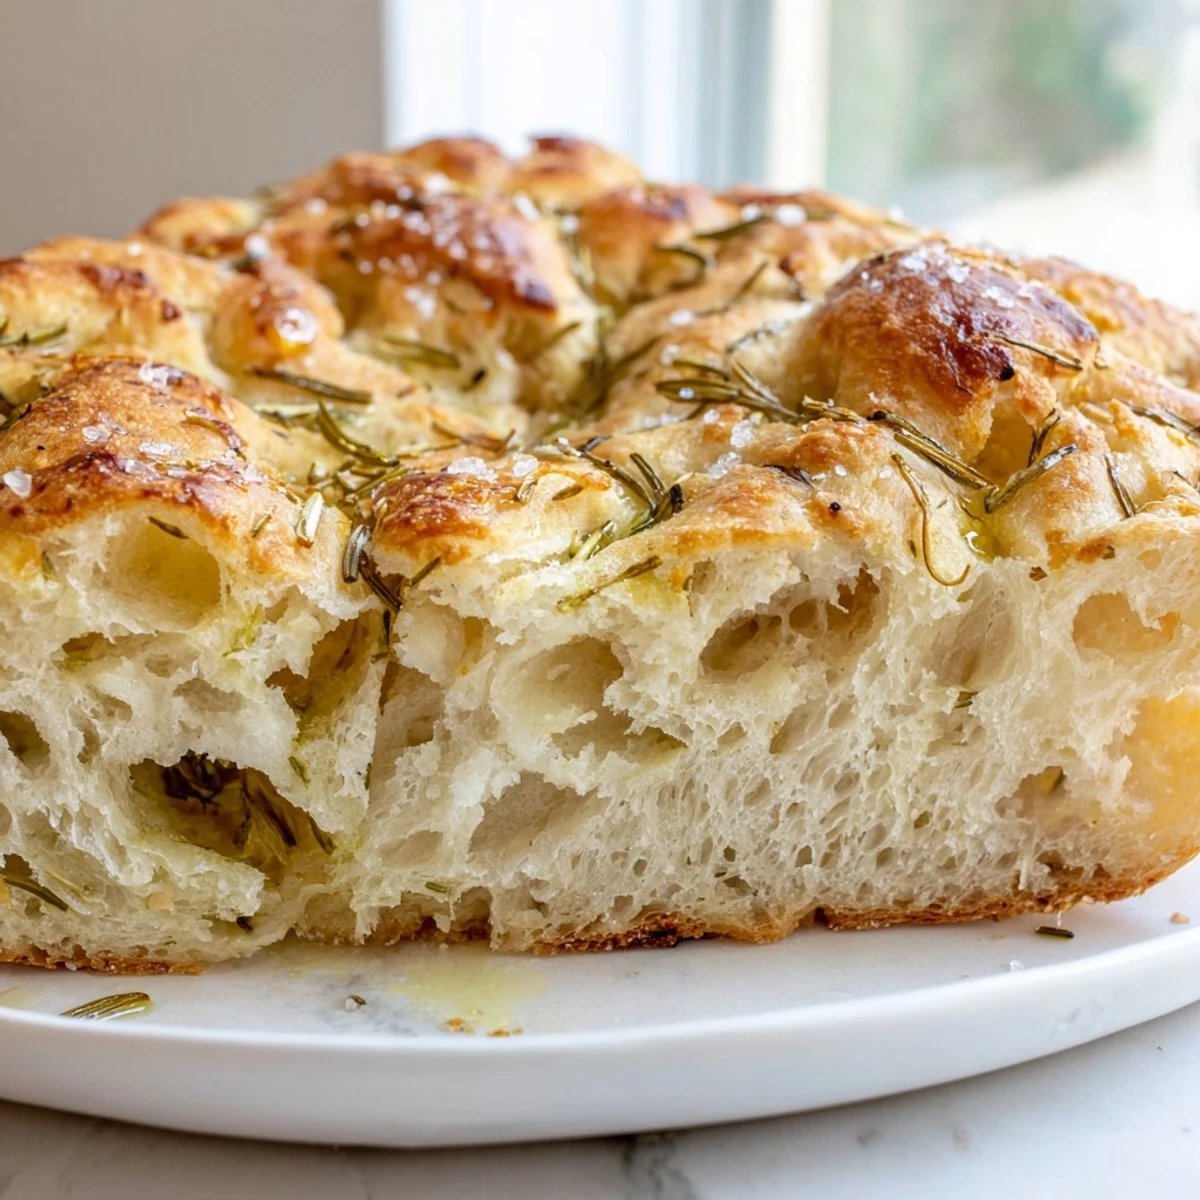
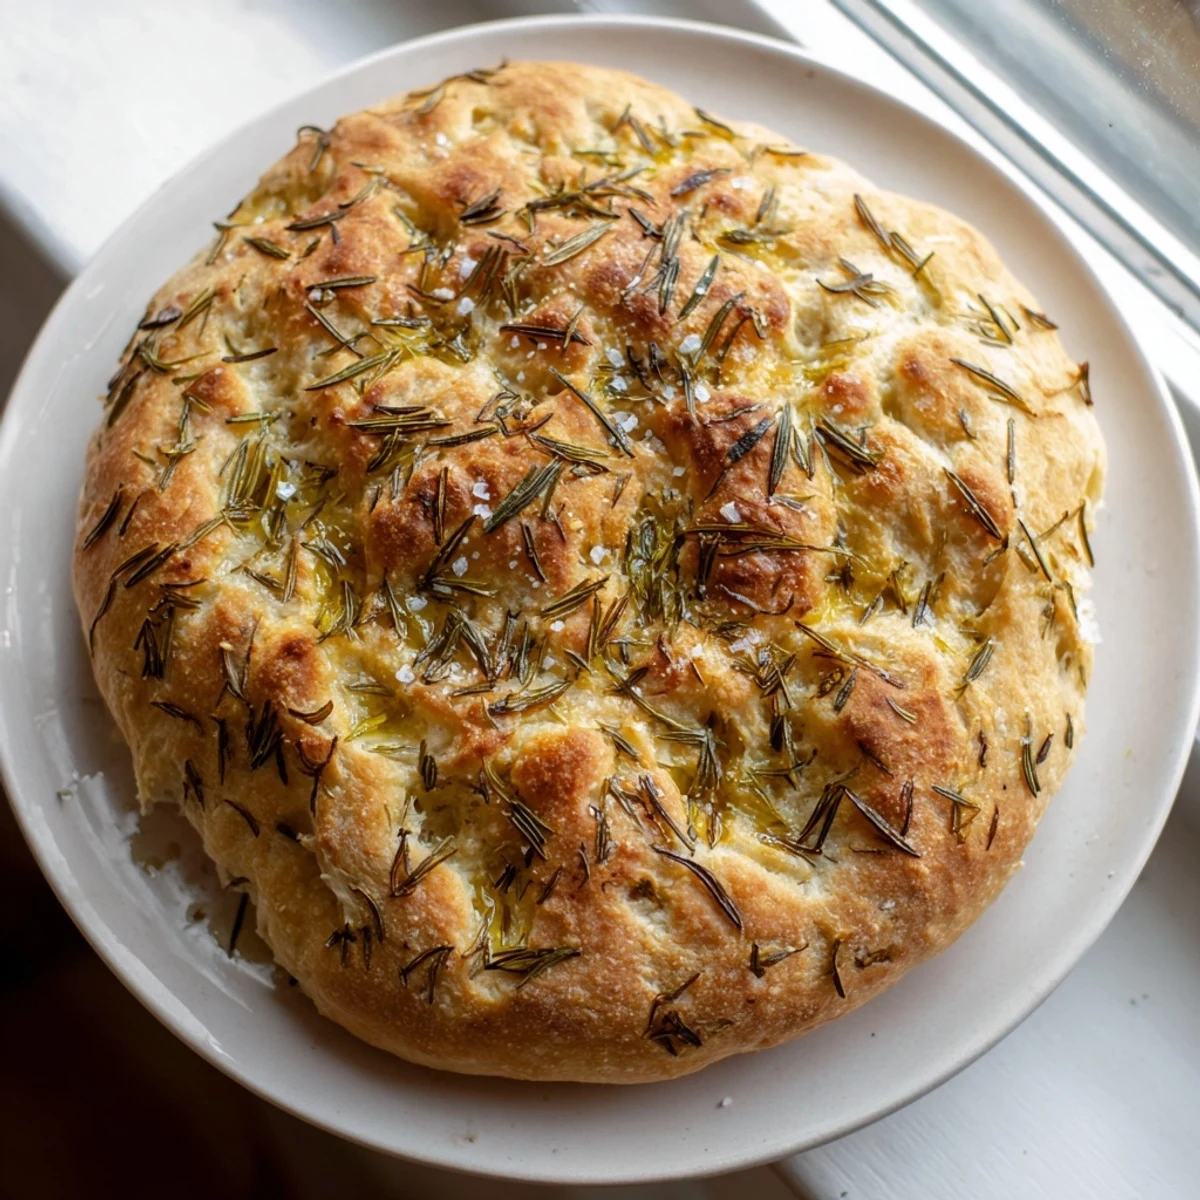
Save This rustic skillet bread brings warmth to any table with its golden crust and fragrant aroma. The combination of roasted garlic and fresh rosemary creates an irresistible depth of flavor, while the cast iron skillet produces those coveted crispy edges. With just over two hours from start to finish—including rise time—you'll have eight generous slices perfect for dipping in olive oil or accompanying soups. The dough comes together easily with basic pantry staples, and the hands-on time is minimal.
The first time I made this skillet bread, my entire apartment smelled like an Italian bakery within minutes of it hitting the oven. I pulled it out too early because I couldn't wait, burning my fingers on that perfect, crackly crust just to get a taste while it was still singing with heat.
Last winter, my neighbor knocked on my door while this was baking, claiming she could smell rosemary through two walls and wanted to know what magic was happening in my kitchen. We ended up sharing the still warm bread with butter right there on the counter, talking about bread making until the sun went down.
Ingredients
- Bread flour (3 cups): Higher protein content than all purpose gives you that satisfying chew and structure that holds up to all those gorgeous aromatics
- Active dry yeast (2 1/4 tsp): One standard packet gives you the perfect rise without any complicated proofing tricks
- Warm water (1 1/4 cups): Should feel like bath temperature on your wrist, too hot kills the yeast, too cold makes it lazy
- Salt (1 1/2 tsp): Do not reduce this, salt is what actually makes bread taste like bread instead of raw flour paste
- Olive oil (3 tbsp total): One tablespoon goes into the dough for tenderness, the rest gets brushed on top for that irresistible golden finish
- Fresh rosemary (2 tbsp): Fresh is absolutely non negotiable here, dried rosemary tastes like dusty pine needles in comparison
- Garlic (4 cloves): Mince these fine so they distribute evenly throughout the dough instead of creating overwhelming pockets
- Flaky sea salt (1/2 tsp): This is the finishing touch that makes every bite sparkle and creates those perfect salty crystals on top
Instructions
- Wake up the yeast:
- Whisk the warm water and yeast in your largest bowl and walk away for 5 minutes, you should see bubbles forming on the surface like a tiny foam party
- Build the dough:
- Add the flour and salt, mix until it looks shaggy and messy, then knead for 5 to 7 minutes until it transforms into something smooth and slightly tacky
- Layer in the flavor:
- Drizzle in 1 tablespoon olive oil, the chopped rosemary, and minced garlic, then knead just until everything is evenly distributed
- Let it work:
- Transfer the dough to a lightly greased bowl, cover with a damp towel, and find the warmest corner of your kitchen for 1 hour until it has doubled
- Prep your skillet:
- Coat your 10 inch oven safe skillet generously with oil, turn the risen dough into it, and press it gently toward the edges
- Second rise:
- Cover the skillet and let the dough puff up again for 25 to 30 minutes while you preheat your oven to 425°F
- Add the finishing touches:
- Brush the top with the remaining olive oil and scatter that flaky sea salt like you are finishing something from a professional kitchen
- Bake to golden perfection:
- Slide the skillet into the hot oven for 30 to 35 minutes until the top is deeply golden and the bread sounds hollow when you tap it
 Save
Save This bread has become my go to when friends come over for soup night, something about tearing off pieces from a shared skillet makes everyone relax and stay at the table longer.
Getting That Perfect Rise
The warmth of your kitchen affects how fast your dough rises. In cooler months, I turn my oven light on and let the dough rise inside, the gentle heat creates the perfect proofing environment.
Herb Variations That Work
While rosemary and garlic are a classic combination, thyme and roasted garlic, or sage and caramelized onions create equally beautiful variations. Whatever herb you choose, keep the same ratio and add it during the kneading phase.
Serving Suggestions
This bread demands to be eaten warm, either straight from the skillet or reheated for a few minutes before serving. Tear it by hand for the most rustic experience, or slice it thick for dipping.
- Pair with a simple tomato soup or hearty minestrone
- Tear into chunks for a charcuterie board centerpiece
- Leftovers make the best breakfast toast, topped with ricotta and honey
 Save
Save There is something deeply satisfying about pulling homemade bread from the oven, especially one that fills your home with such incredible warmth and fragrance.
Recipe FAQs
- → Can I use dried rosemary instead of fresh?
-
Yes, substitute 1 teaspoon of dried rosemary for the fresh. However, fresh rosemary provides a more vibrant flavor and aroma that really shines in this bread.
- → What if I don't have a cast iron skillet?
-
Any oven-safe 10-inch skillet works well. An aluminum or stainless steel pan will produce good results, though cast iron creates the best crust and heat distribution.
- → How should I store leftover bread?
-
Wrap tightly in plastic or store in an airtight bag at room temperature for up to 2 days. For longer storage, freeze slices and reheat in the oven.
- → Can I make this dairy-free?
-
This bread is naturally dairy-free. Use olive oil throughout and avoid brushing with butter. The result remains perfectly moist and flavorful.
- → Why did my dough not double in size?
-
Your kitchen might be too cool, or the yeast could be expired. Ensure water is warm (not hot) and find a warm, draft-free spot. Rising times vary with temperature and humidity.